To connect a computer to the LAN connect it via ethernet to any outlet with the “Uni” label. (TODO: label the outlets!). The computer needs to be configured with a static IP, with the following settings:
IP: 192.168.113.XXX (XXX can be any number between 1 and 255, please verify that the IP is not used in the list of computers below)
Subnet mask: 255.255.255.0 (or 24 if the mask length is required)
What follows is a step-by-step guide for connecting to the VPN in the case of a Windows computer. If you are using another operating system you need to use a different client.
The procedure is the following:
Copy your certificate and configuration files in a folder of your choice in your computer. For (e.g. C:\Users\<user_name>\Documents\openvpn\)
Edit lines 88, 89, 90 and 108 of the client_template.ovpn file (you can rename it if you want), and replace the following strings:
<path to keys folder>: the folder path where you copied the files (e.g C:\Users\<user_name>\Documents\openvpn\). Pay attention to use the double inverted slash \\ instead of the single \ !!!
<client_name>: the name of your certificate file.
Locate the OpenVPN-GUI icon next to the windows clock. If it is not there, you have to execute the OpenVPN-GUI application (which you installed in point 1) and normally it should appear.
Right click on the icon and click “Import file”, locate the configuration file that you edited in point 3 and import it.
Right click again on the OpenVPN-Gui icon and click connect. If the connection is successful you should get a message telling you that you are connected to the VPN. Now you can access all the computers in the lab using remote desktop, as if you were at SWAN.
Note: by default, the OpenVPN client will try to establish a connection at the computer startup. If you want to change this behavior you can go to Settings and disable the option “Launch on Logon”.
Make sure that in the .ovpn file the lines 88 - 90 contain the following:
88. cr “< copy path of your ca.crt file into here! >“
89. cert “< copy path of your <client name>.crt file into here! >“
90. key “< copy path of your <client name>.key file into here! >“

(You need to replace the text above with your files' path)
Drag and Drop your .opvn file into Tunnelblick’s Configuration Window.
In case of error, make sure that your paths are edited correctly within your .opvn file.
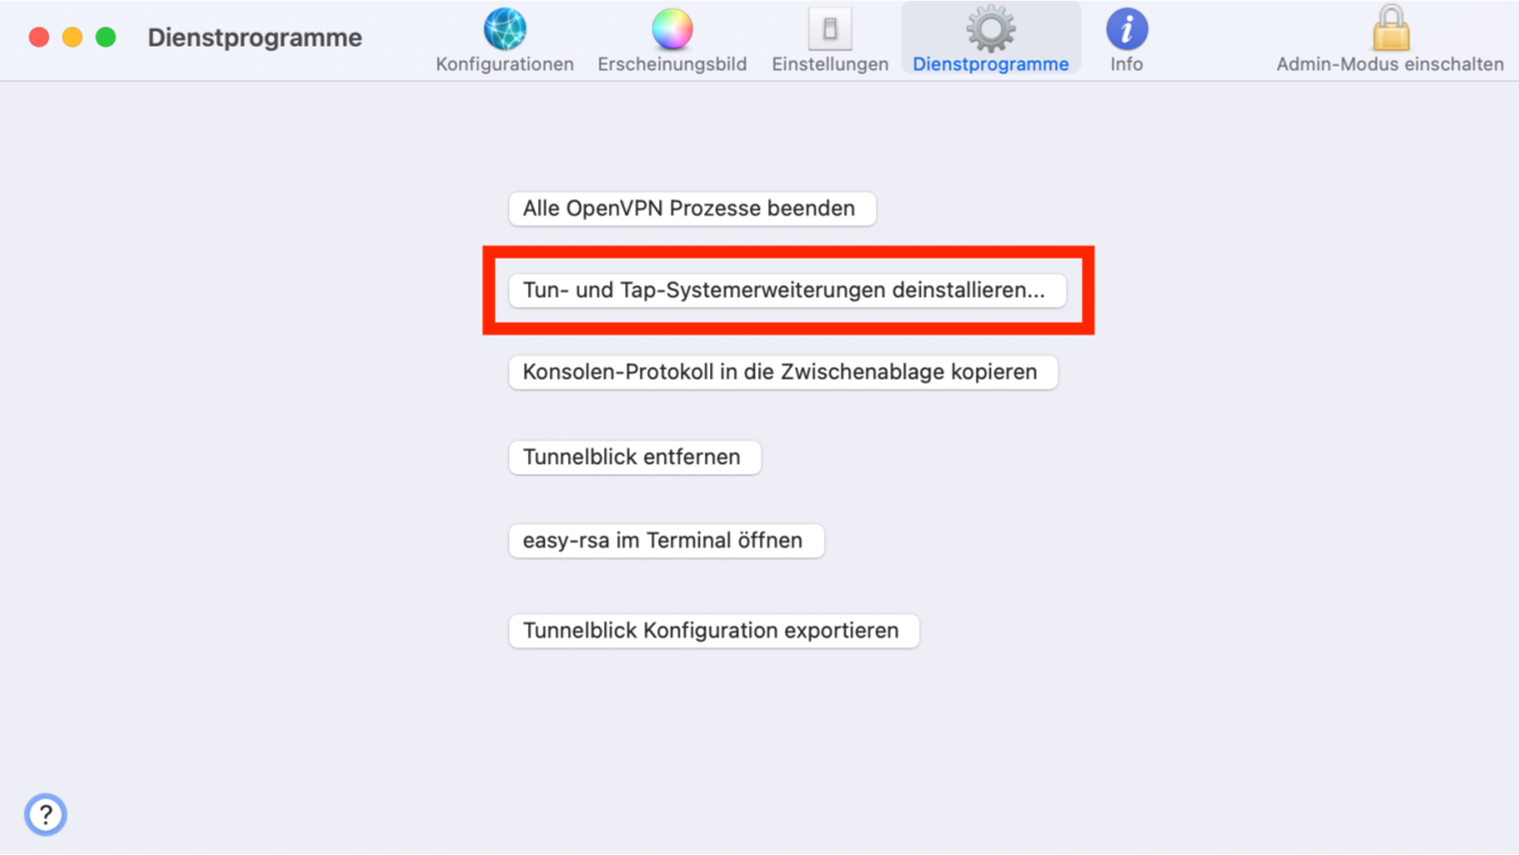
Go to Tunnelblick’s Dienstprogramme submenu (Utilities) and click on the second button “Tunund Tap-Systemerweiterungen installieren…”
#. This won’t be possible at first, as under the new MacOS (Sierra (?) and newer) some security
setting have to be changed. This is done as follows:
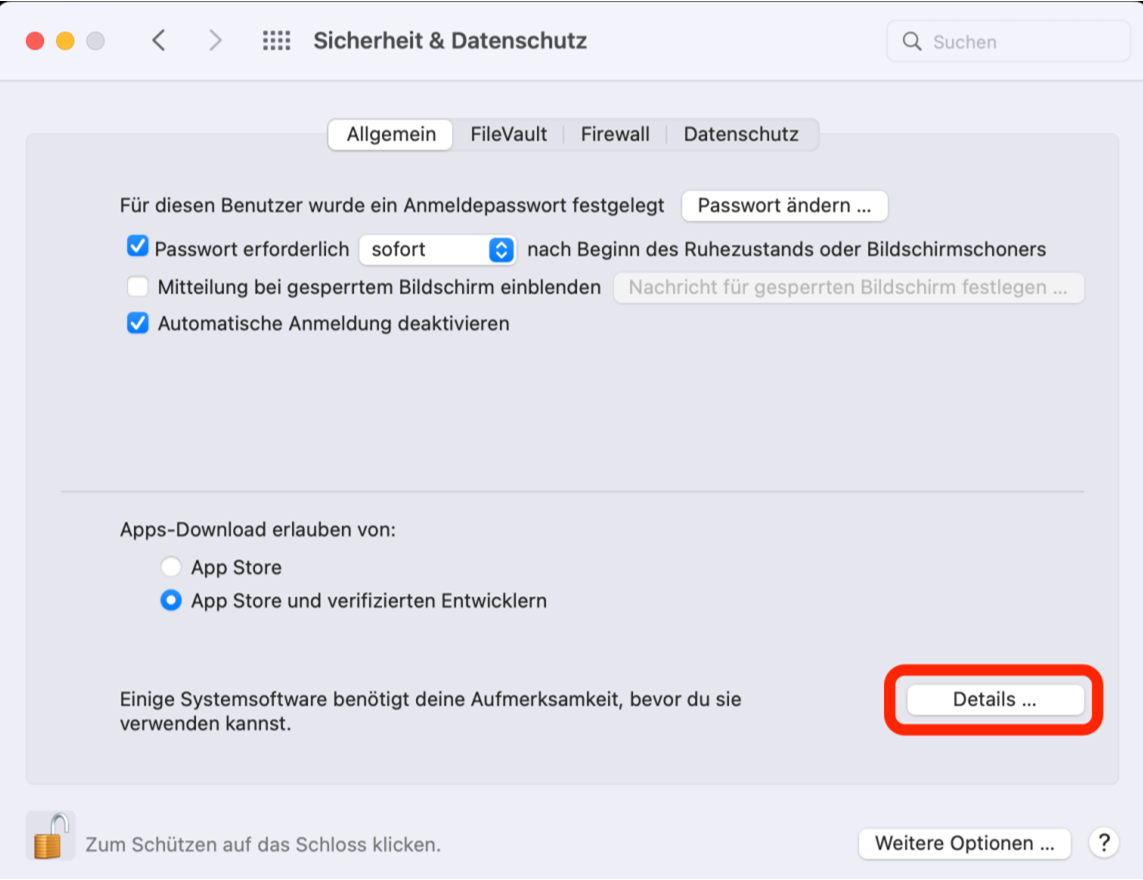
Go to your Mac’s “Security & Privacy” settings in your System Preferences
Under the “General” Tab click the “Details …” button:
The System will ask you to change your Computer’s Security policy and allow also nonapple-controlled software to make changes in your system. This is needed for Tunnelblick to work.
Turn off your computer and turn it on again with a long press on the power button. Keep the Power button pressed until you enter your Computer’s advanced settings menu.
Choose “Options”
On the bar on the top of your screen chose “Utility settings” (Dienstprogramme) > Startup Security Utility (Startsicherheitsdienstprogramm)
Select your main volume
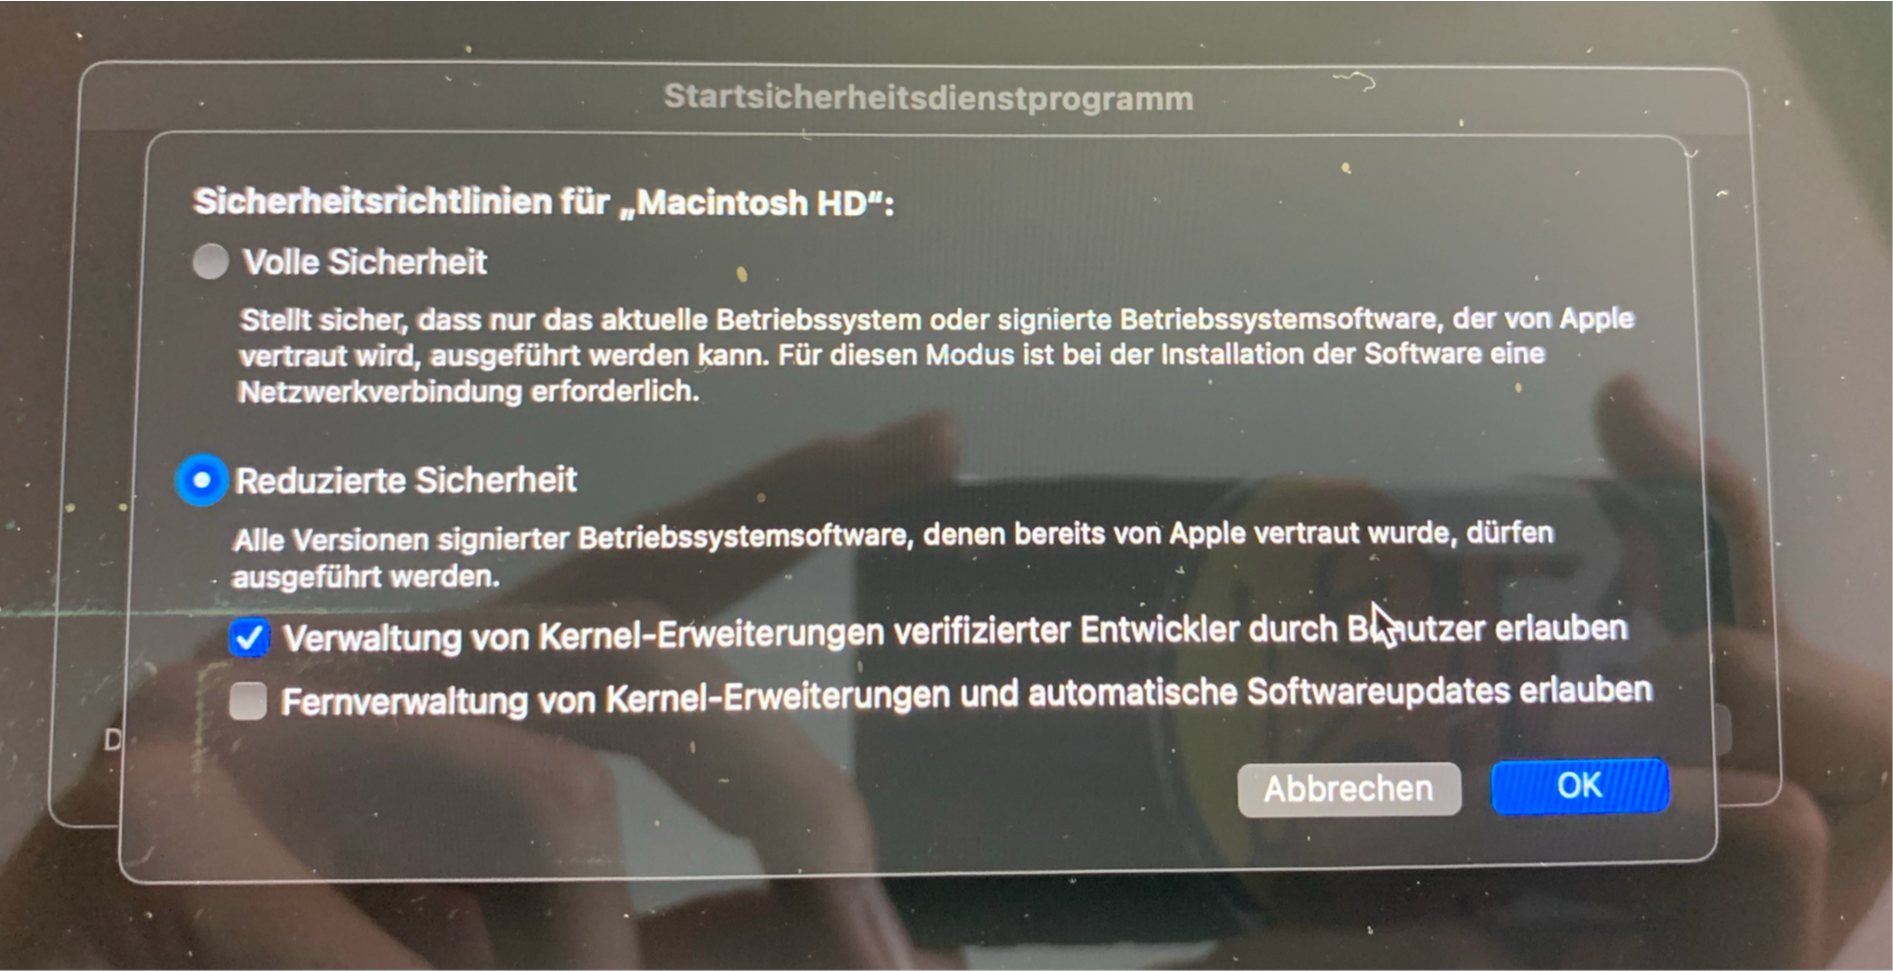
In this window, select the reduced security option and make sure the first of the two checkboxes is checked:
Click “Ok” and restart your Mac
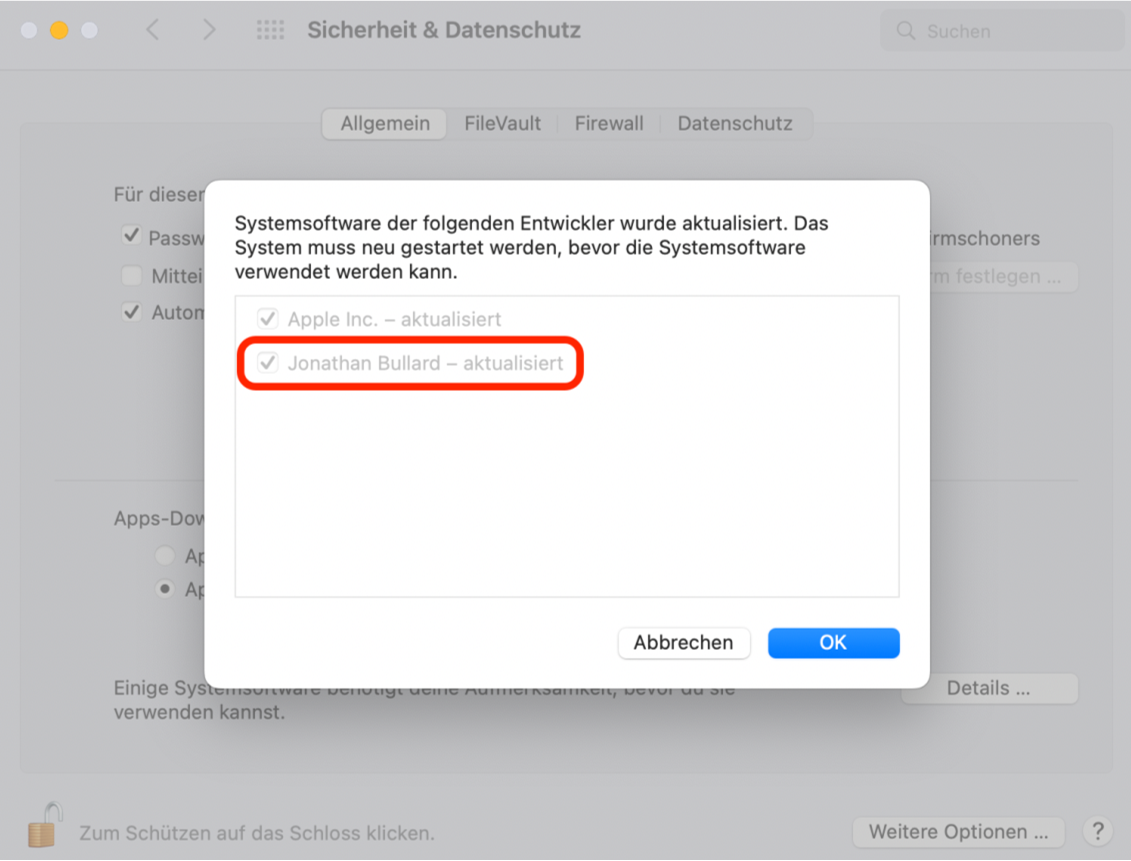
Go back to your “Security & Privacy” Settings tab within your System Preferences.
Click the “Details” button again and make sure that the checkbox for “Jonathan Bullard” is activated, such that the Tunnelblick add-ons can be installed.
Go back to Tunnelblick, deinstall the add-ons and reinstall them.